
chair care
because I really do care... about this chair

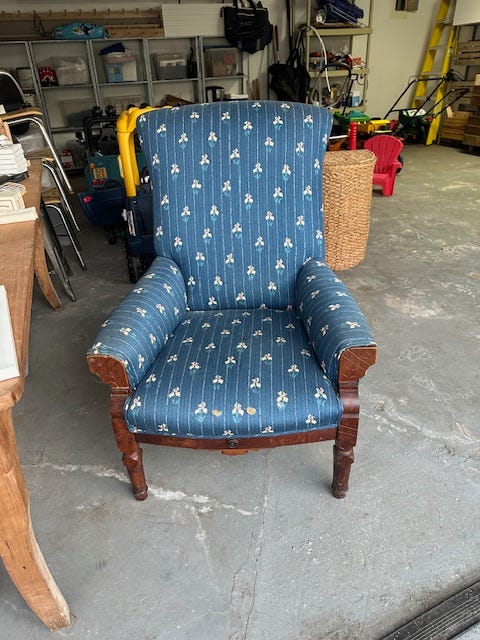
I bought this chair on a whim at Goodwill a year or so ago. I liked the bones. Hated the fabric. & thought, “hey, I am a crafty girl, lover of textiles, capable of new challenges- I should recover this thing.”. so for $30, I bought her with the hope of a quick flip. & she has sat literally here, in our garage, ever since… since we went into said garage to clean out (more on my cleaning out frenzy for a future substack), & there she sat amongst other crafts yet to be completed (ahem, my stint with basket weaving, beading, & many, many more).
so, I said let’s do this thing. & here’s the thing (& spoiler alert): reupholstery is not for the faint of heart. & also, spoiler, I am still not done with her, but since this is another neglected WIP, I thought I’d bring you along for the journey…
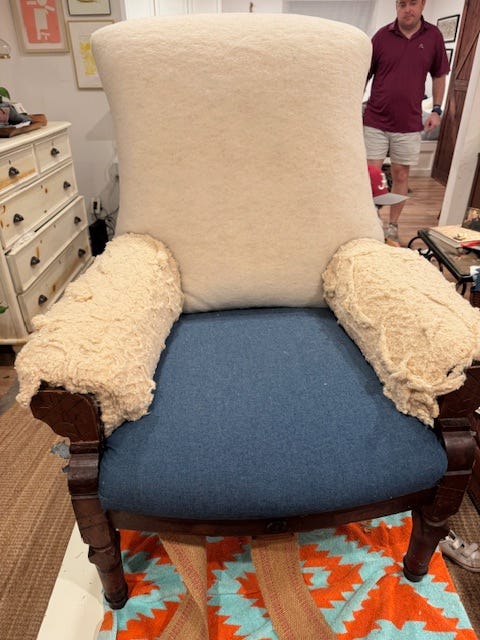
see? she cute.
when it comes to reupholstering furniture, to me, the most fun part is taking it apart. talk about therapy. deconstruction is the construction my body/soul/spirit needs.

quickly realized, this project called for specialist equipment.
& moral support!
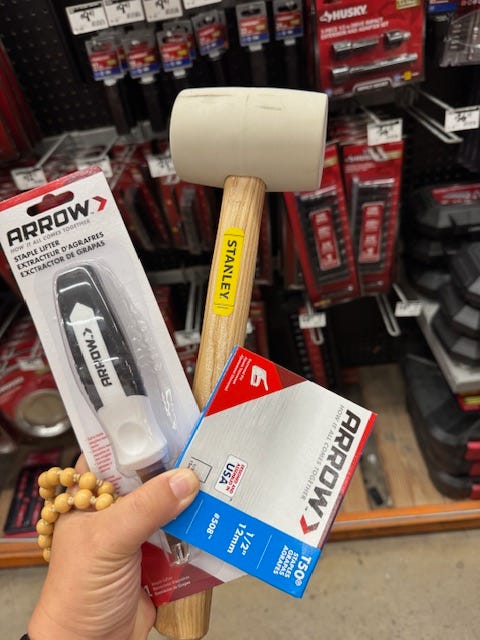
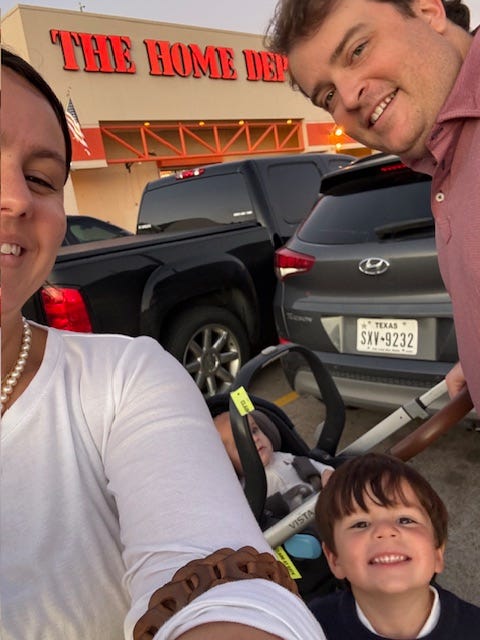
fully believe Home Depot is the adult version of a craft store. is there anything better than new tools?
also, just a note: we are using a hand held staple gun, but I am really wanting an air staple gun, which a quick google just told me is under $40, so a trip back to HD is in order. maybe it will give me the confidence I need to finish this thang.
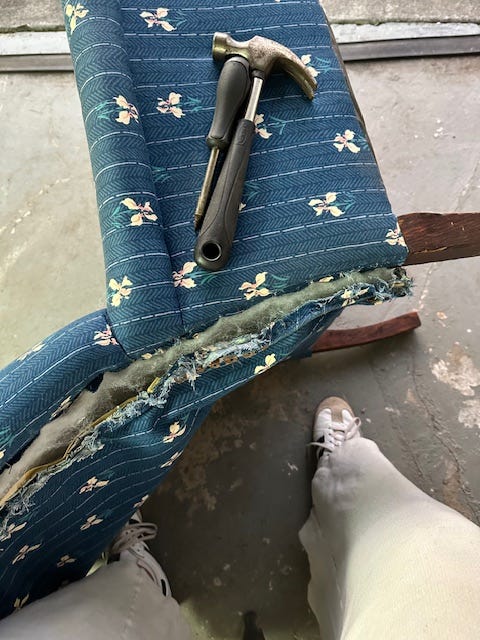
proof.

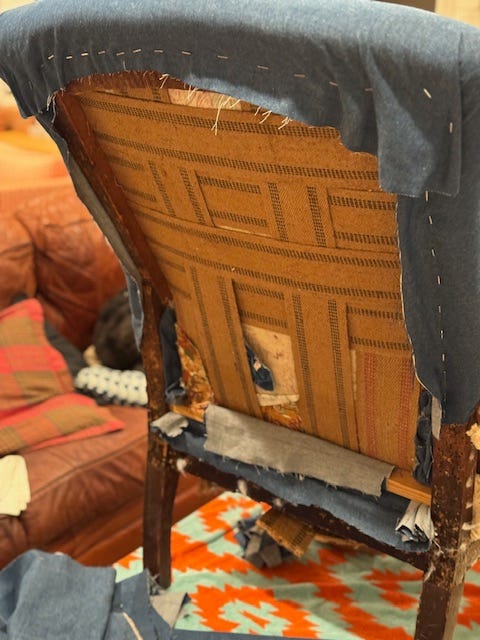
things get serious when you realize how many layers & components go into making the things we use every day.
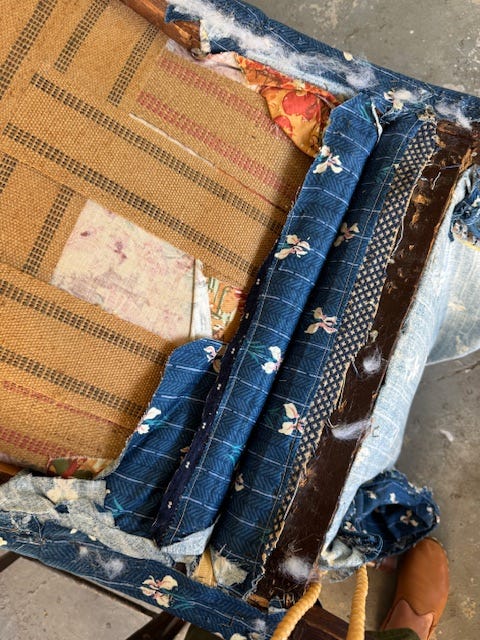
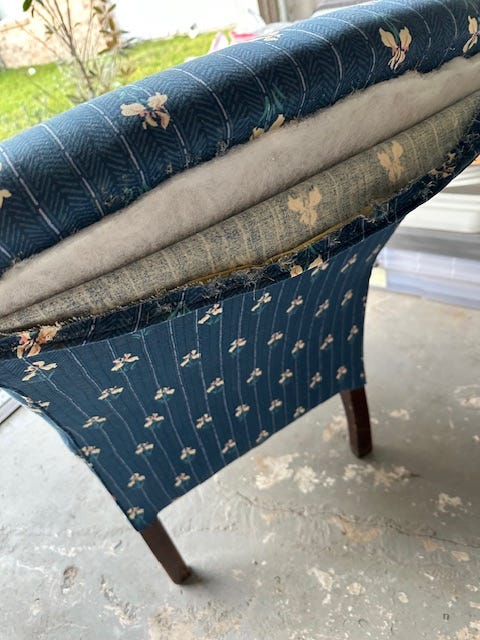
like an onion, this one has some layers. apparently I was not the first person to be inspired to recover this chair. think I found at least 4 different fabrics inside.
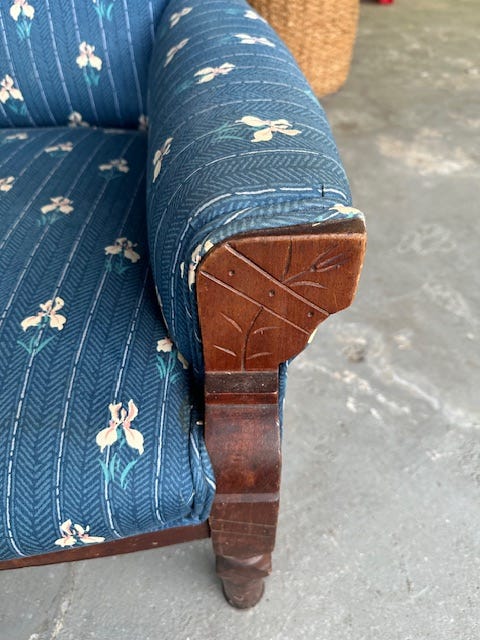
when taking the chair apart, it is important to keep the fabric in tact, because it becomes the pattern you use for your new fabric.
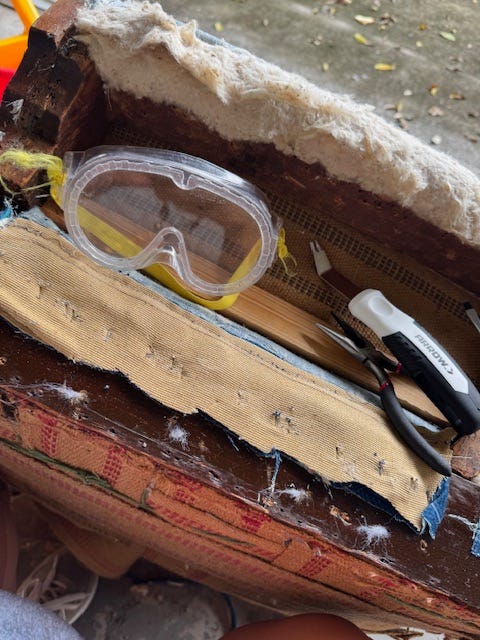
even used Smith’s safety goggles, because once I got in a groove with my new staple remover, those guys were flying.
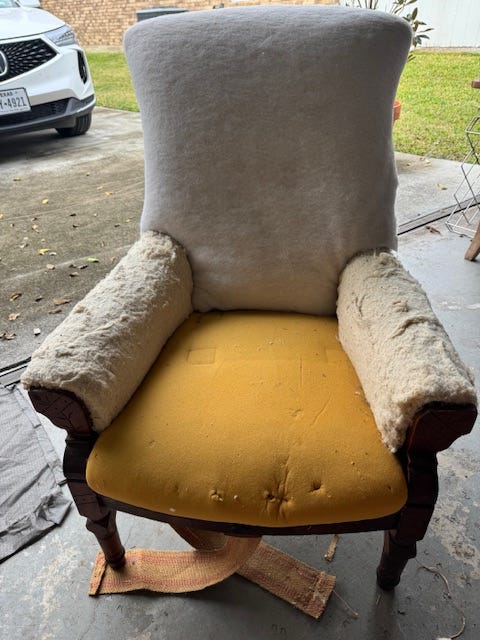
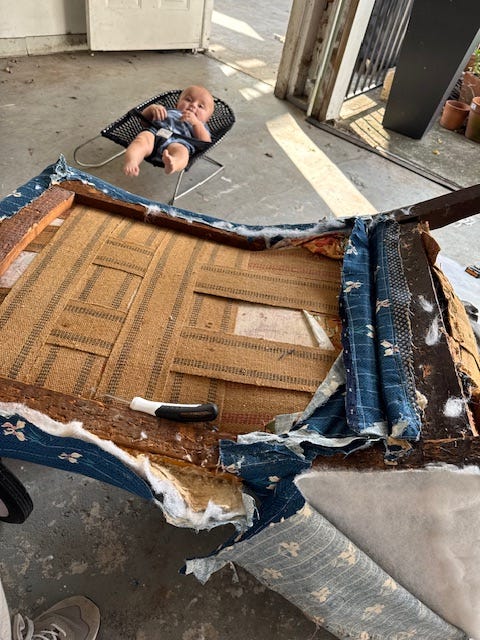
okay, here she is: fully undressed. I probably should have done new batting & foam, but I am happy for now that at least I didn’t this go around, because the fitting of the textiles has proven to be most challenging. thankfully, my innards were in okay condish.
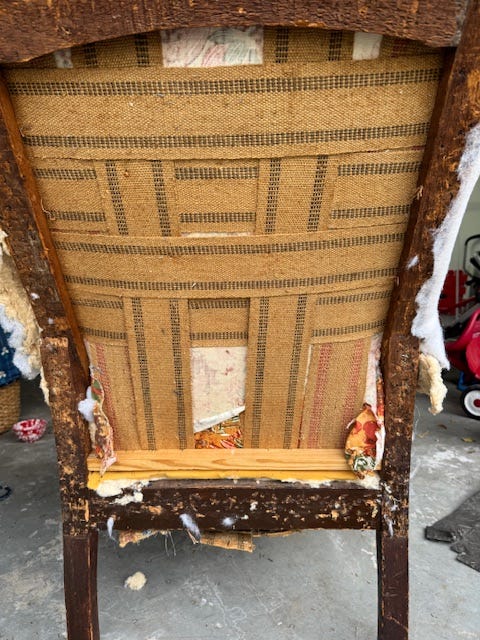
look at how many staples had been in this chair! also, thankful I did not have to re-do webbing, because that would have required taking it all the way down to just the wood.
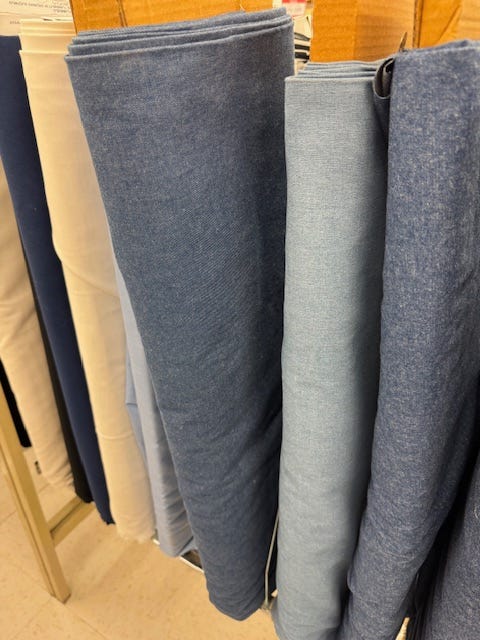
I have always liked denim in interiors, & immediately imagined this chair with denim & some piping so we went to literally Hobby Lobby to select the fabric. 40% off was just the ticket I needed especially knowing that I really didn’t know anything about what I was doing with this project.
excited to try different & more designer fabrics when my skill set matches the price tag.
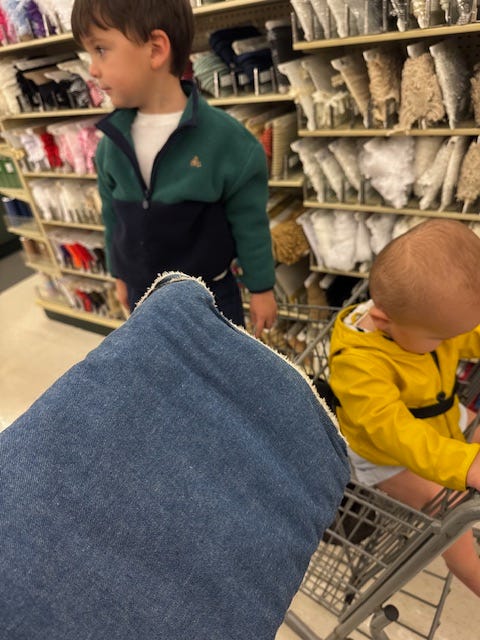
helpers helping. goods gotten.
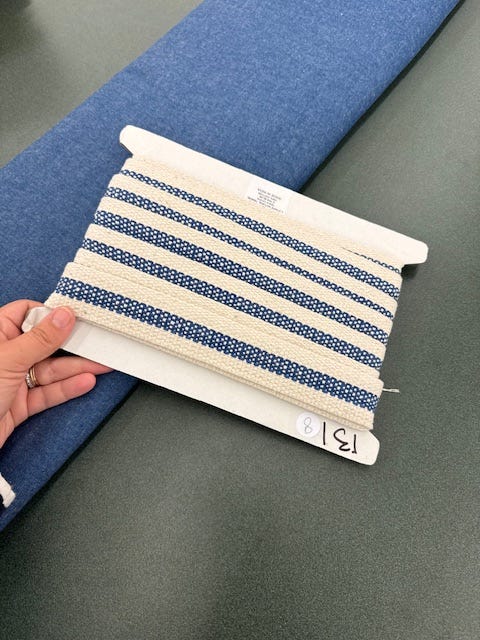
okay, I also fell in love this trim, but haven’t the slightest on where to put it. thought around edges, but it is too thick. ideas? holler at me if you have one!
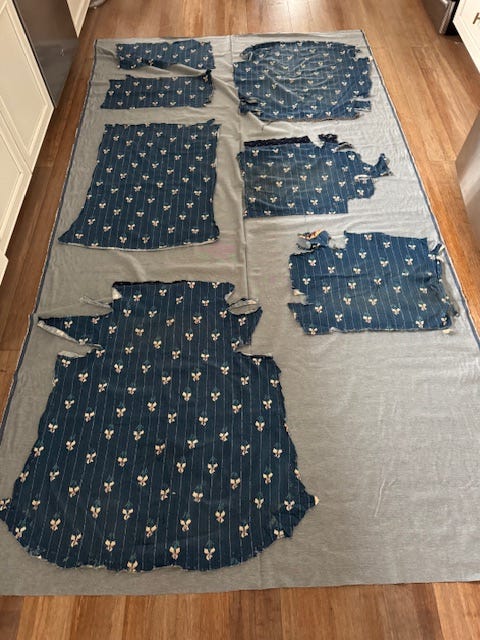
I got 3 yards for this chair, & have plenty to spare. I laid it all out on the floor so I could mark it all up to make the patterns. realizing now that I should have put wrong side down, but alas, we learning. I also just drew around them with marker, but gave myself a lot of extra seam allowance, which gave me peace of mind.
& we’re off!
I should say: this first section was not so bad, thrilling actually, but the edges and curves are difficult. you have to make cuts at angles to fit it, which cause wrinkles, & nobody likes wrinkles- am I right?!
also, I had plenty of fabric, & did some very cautious cuts, but somehow cut too deep of a “v” on the back right corner. you can’t see it & it is hidden under the cushion, but I literally lost sleep over if it is going to rip when I sit on it, so can someone still reading this tell me it is going to be okay? because my sanity depends on it.
looks somewhat similar to the person’s work before me, right? kind of on the right track?
it is really fun to pull the fabric through the bars, just fyi.
some of us worked harder than others…
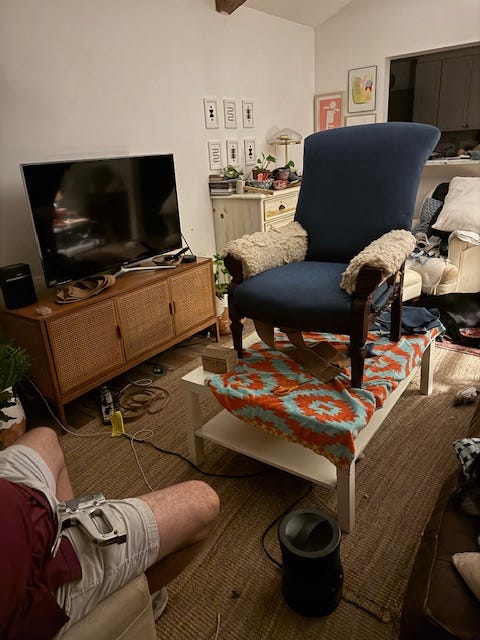
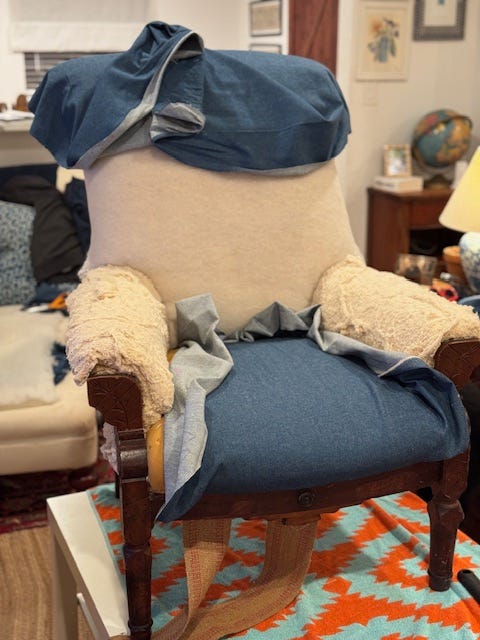
it got late. the midnight oil was definitely burning. our living room was destroyed/taken over. & my staple guy gave out. pretty sure this was actually around midnight, & David had just realized what I had: we were in way over our heads.
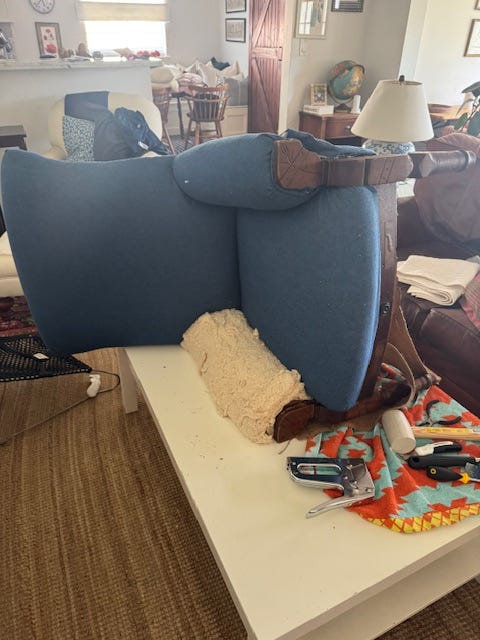
this is where I’ll leave you. a farewell to arms. things went sidewards, & angles got tricky. let’s just say we are going to need lotsss of hot glue gun-ing & thiick piping to seal this deal. I got to the point where I had to put it all back in the garage. back where we started. only to be pulled out again at peak confidence & when the inspiration strikes.
stay tuned!
-Kimberly
*I have used Create Academy, Micaela Sharp’s, course as my guide, & she and the course are truly wonderful. I have listened & re-watched so many times. She also has a book about reupholstery that I need to order as well. This is my biggest reco to start with her, learning from a true expert!*
P.S - it took me over a year to redo a tiny little accent chair with just one seat cushion, so you’re doing fab!
Kimberly - I’m loving this behind the scenes. I relate to this on so many levels as a fellow crafty girl. Sometimes I think I’m better described as creative than crafty because let’s be honest… DIY is hard. Loved the read 💙🤍